
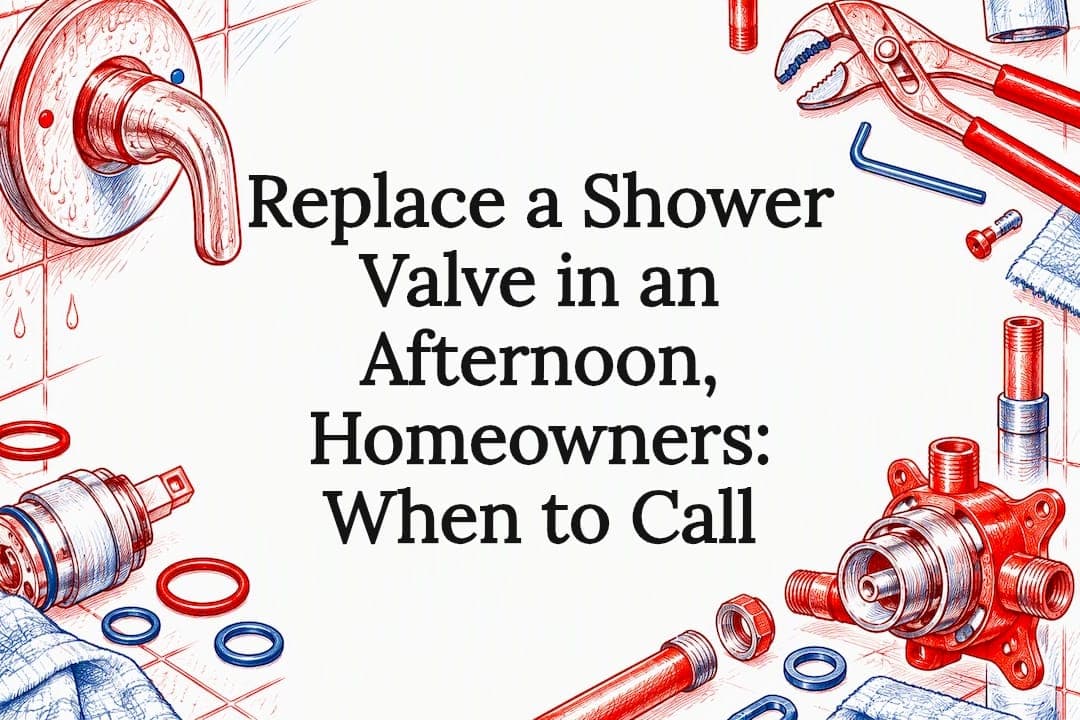
Replacing a shower cartridge is a job most homeowners can handle in an afternoon, but swapping the entire valve body is a different story, especially when it hides behind tile with no back access. Before you buy a single part, shut off your water and pull the trim to see exactly what you are working with. If you find severe corrosion, no back access, or a job that calls for soldering or repiping, that is your cue to call a licensed plumber instead of pushing forward.
TL;DR:
- A cartridge replacement typically costs $100 to $350, while full valve body replacement ranges from $225 to $575, depending on complexity.
- Proper identification of your valve type requires recording the model number, hot side marking, stem diameter, and installation age, often aided by photos.
- Access issues like no back wall space or corrosion often necessitate professional help, especially if soldering or drywall removal is involved.
- A vinegar soak test before purchasing parts can diagnose whether mineral buildup or worn seals are causing problems, reducing unnecessary repairs.
- Most DIY fixes rely on turning off water, removing trim, loosening the bonnet nut, extracting and replacing the cartridge, then testing gradually to prevent leaks or damage.
Table of Contents
- How to identify your shower valve and cartridge type
- Parts and tools you'll need for the job
- Step-by-step: replace a shower cartridge safely
- Full valve-body replacement and your access options
- Troubleshooting, permits, and typical costs
- Field-tested tips and red flags from Aaron Waller
- Our take on DIY shower valve work
- Professional help when the job is beyond DIY
- FAQ
- Sources
How to identify your shower valve and cartridge type
You cannot buy the right part until you know what is behind your shower wall, and guessing here wastes time and money. Start by looking at how the handle moves. A single handle that turns left and right for temperature and pulls out for volume usually points to a single-handle cartridge valve. A handle that only rotates, with a separate volume control, often signals a pressure-balancing or thermostatic valve, and a third handle or lever nearby typically controls a diverter for a handheld or tub spout.
Escutcheon screw placement matters too. Manufacturer guides recommend identifying the valve family by where the screws sit on the plate, how the handle operates, and roughly when the shower was installed, since trim kits and cartridges are not interchangeable across valve types or even across different years of the same brand.
Once you remove the trim plate, you will see the valve body and, if you are lucky, a stamped model number. Here is what to record before you head to the hardware store or parts counter:
- The model number stamped on the cartridge or valve body, often found near the stem or bonnet.
- Any "hot side" or "H" marking, which tells you the correct cartridge orientation.
- The stem diameter and shape, since cartridges vary even within the same brand's product lines.
- The approximate age of the shower, which narrows down which generation of valve you likely have.
If nothing is stamped clearly, snap a few photos: one of the full valve body with trim removed, one close-up of any lettering or numbers, and one with a tape measure next to the stem for scale. Bring these to a plumbing supply counter or upload them when searching a manufacturer's part chart online. A ten-minute photo session can save you two or three trips back to the store trying different cartridges that almost fit.
Parts and tools you'll need for the job
Having everything staged before you shut off the water keeps a thirty-minute cartridge swap from turning into a half-day project. Most of these tools are things you already own or can borrow cheaply.
Tools:
- Phillips and flathead screwdrivers for the handle and escutcheon.
- Adjustable wrench and a strap wrench for the bonnet nut.
- Cartridge puller designed for your valve brand, especially for older or corroded cartridges.
- Vise grips for stubborn fittings, plus plumber's grease and Teflon tape for reassembly.
- Bucket, old towels, and a flashlight, since you will be working in a tight, often dim space.
Parts: a cartridge kit matched to your valve model, which typically includes the cartridge itself, new O-rings, and sometimes a replacement bonnet nut or retaining clip. If your trim is worn or mismatched, pick up a full trim kit at the same time. For valve-body jobs, you will need a valve-body kit rated for your rough-in dimensions rather than just a cartridge.
Before you check out, match the model number on your new cartridge against what you recorded from the old one, and confirm the hot and cold orientation lines up with your plumbing, since some valves are handed differently depending on installation. Spending a little more on a quality cartridge from a reputable brand tends to pay off in fewer callbacks and a longer service life than the cheapest option on the shelf.
Pro Tip: Buy two cartridges if your model is common and inexpensive, since having a spare on hand means you are not scrambling if the first one is defective out of the box.
Step-by-step: replace a shower cartridge safely
A cartridge swap follows a predictable sequence, and sticking to the order below keeps you from flooding the bathroom or damaging the valve body.
- Shut off the water. Find the shutoff valves behind an access panel or at the main supply, close both hot and cold, then open the shower handle to relieve pressure and confirm the water is off.
- Protect the area. Lay towels in the tub and keep a bucket nearby to catch the small amount of water trapped in the lines.
- Remove the handle. Pull off any decorative cap, unscrew the handle, and set the screws aside somewhere you will not lose them.
- Remove the escutcheon plate. This usually unscrews or pulls straight off once the handle is clear, exposing the valve body and bonnet nut.
- Locate and loosen the bonnet nut. Use your wrench or strap wrench to turn it counterclockwise. Delta's instructions for its RP46074 cartridge describe this same sequence: unscrew the bonnet nut, then pull the cartridge straight out.
- Extract the old cartridge. If it resists, reattach the handle to the stem for extra leverage and pull straight out, or use a cartridge puller. Avoid prying with a screwdriver, since that can crack or scar the brass valve body.
- Flush the valve body. Run a quick check for debris or mineral buildup inside the opening before inserting anything new.
- Orient the new cartridge. Line up the "hot side" marking toward your hot supply, exactly as the manufacturer instructions specify.
- Lubricate the O-rings with plumber's grease, then seat the cartridge fully and evenly.
- Hand-tighten the bonnet nut, then snug it with a wrench, being careful not to overtighten and crack the housing.
- Reattach the escutcheon and handle, then turn the water back on slowly.
- Test in stages: check for drips at the valve first, then run hot and cold separately, then test the full temperature range and shutoff.
One in five DIY plumbing failures traces back to a part that does not match the installed valve. If your cartridge was expensive but still fits poorly or your temperature control feels off after installation, double-check that you purchased the exact model rather than a close substitute.
If you still see leaking or the temperature control feels backward or unresponsive after installation, work back through the likely culprits in order: confirm the cartridge is oriented with hot side correctly positioned, check that the O-rings seated without pinching, and verify the bonnet nut is snug but not overtightened. If all three check out and the problem persists, the valve body itself may be worn or damaged, which means it is time to consider a full valve replacement or bring in a plumber.
Full valve-body replacement and your access options
Some problems cannot be solved with a new cartridge, no matter how careful the installation. Cracked brass, stripped threads inside the valve body, or a leak that returns within days of a fresh cartridge swap all point to a valve body that has reached the end of its life.
The next question is access, and it drives almost everything about cost and difficulty. If your shower backs onto a closet, basement ceiling, or accessible wall, a back-access approach lets a plumber or confident DIYer reach the valve from behind without touching the tile at all. Without that access, you are looking at a few options:
- Cutting an access panel into the back wall if one exists or can reasonably be added.
- Removing a section of tile on the shower wall itself and patching afterward.
- Using an extension kit or valve adapter designed to retrofit a new valve body to the existing rough-in, which can sometimes avoid major demolition.
Each of these adds cost and complexity beyond the valve itself. Cutting into tile means you will need to patch, and possibly retile, the finished surface, which is a different skill set entirely. If the old valve was soldered to copper supply lines, replacing it usually means soldering the new connections too, and any water that got into the wall cavity over time may have caused damage that needs repair before you close everything back up. This is also where our bathroom remodel guide covers what finish repair after an access cut typically involves.
Pro Tip: If you suspect you will need tile or wall access, check for a service panel on the opposite side of the wall before you pick up a hammer. It is often faster and cheaper than demolition and patching.

Troubleshooting, permits, and typical costs
Matching your symptom to the right fix saves both time and money, and it keeps you from replacing a part that was never the problem in the first place.
| Symptom | Likely cause | Recommended fix | Rough time estimate |
|---|---|---|---|
| Steady drip when off | Worn cartridge seals | Cartridge replacement | 30 minutes |
| Temperature swings during use | Pressure-balancing spool stuck or scaled | Clean or replace cartridge | 30 minutes |
| Low flow from the showerhead | Mineral buildup in cartridge or showerhead | Soak and clean, or replace cartridge | 30 minutes |
| Leak persists after cartridge swap | Cracked or corroded valve body | Full valve replacement | Half day to full day, often with a pro |
Permits are easy to overlook but worth checking before you start, especially for a full valve replacement. Chicago's building permit guidance notes that repairing a leak without replacing or rearranging valves or pipes is often exempt from a permit, but replacing a valve body or rearranging plumbing commonly does require one. Rules vary by municipality, so a quick call to your local building department before you start a valve-body job can save you a headache later.
On cost, HomeGuide's cost data shows cartridge-only replacement typically runs $100 to $350 including labor, while a full valve replacement usually falls between $225 and $575. If you are doing the cartridge swap yourself, check the client's site for current parts prices. Add tile removal or drywall repair to a valve-body job and the total climbs further, which is why confirming access before you start matters so much. For readers who need that finish work handled, our partner at Wendell Barco Plastering covers common signs that drywall repair is needed after this kind of access work.
Field-tested tips and red flags from Aaron Waller
A few habits separate a clean cartridge swap from a frustrating one, and most of them come down to technique rather than tools.
- Reattach the handle to the stem before pulling a stuck cartridge. The extra leverage is usually enough, and it avoids the gouges that come from prying with a flathead screwdriver.
- If a cartridge feels frozen in place from mineral deposits, soak it in a 1:1 mixture of white vinegar and water for about 30 minutes, then shake it. If it rattles, the internals are likely still functional and worth reinstalling after a good flush.
- Never force a cartridge puller against the brass threads if you feel heavy resistance. Back off and check for a retaining clip you may have missed.
A few signs tell us it is time to stop and call a licensed plumber rather than push ahead. Visible corrosion or greenish staining on the valve body often means the brass is compromised beyond a simple cartridge fix. Water inside the wall cavity, discovered when you pull trim or cut an access panel, points to a leak that predates your repair and needs proper diagnosis. Unknown piping materials, particularly older lead or galvanized lines, change the entire scope of the job and are not something to tackle without professional evaluation. And any job that requires soldering copper or repiping a section of the supply lines moves past typical DIY territory into work where a mistake can mean a flooded bathroom or a code violation.
Our take on DIY shower valve work
The cartridge swap gets oversold as universally easy, and the full valve replacement gets oversold as universally hard. Neither is quite true. A cartridge job is genuinely low-risk because you are working with isolated water and a part designed to be swapped. The real decision point is access, not skill. A homeowner who has never touched a wrench can often manage a cartridge replacement in an afternoon, while a seasoned DIYer with no back access to a recessed valve is better off paying for that access to be opened cleanly rather than guessing at tile demolition.
What gets underweighted in most advice we have seen is the diagnostic soak test: thirty minutes with vinegar and water tells you more about whether your real problem is mineral buildup or a worn-out cartridge than any amount of guessing. Do that before you buy a replacement part. It is the cheapest troubleshooting step available, and it often changes the entire plan.
— Aaron Waller, General Manager
Professional help when the job is beyond DIY
We understand the appeal of handling a shower valve yourself, and for a straightforward cartridge swap, that is often the right call. But some jobs are better handed to a licensed professional, and knowing the difference protects your bathroom and your budget.
Reach out if you are facing no back access to the valve, visible corrosion on the valve body, a job that requires soldering or repiping, or work that triggers a local permit requirement. Here is what working with a plumbing service typically looks like:
- A diagnostic visit where we identify the exact valve type and the scope of the repair.
- Parts sourced to match your specific valve, avoiding the trial-and-error of guessing at compatibility.
- Work performed by licensed technicians who communicate directly with you.
- A cleanup that leaves your bathroom in the same condition it was found, aside from the fixed problem.
| What you get | Why it matters |
|---|---|
| Access to local experts | No automated menus between you and the person doing the work |
| Written estimate before work begins | You understand the scope and cost before committing |
| Plumbing technicians | Work meets code requirements for permit-triggered jobs |
If you decide a full valve replacement or an access panel is the right path, our plumbing repair and faucet services page covers what we offer and how to request a visit. Compare the scope and warranty of any quote you receive, ours included, before deciding who does the work.
FAQ
Can I change a shower valve myself?
A cartridge swap is a realistic DIY project for most homeowners with basic tools and a couple of hours. Replacing the full valve body is more demanding, especially if it requires cutting into tile or soldering copper pipe, and often makes more sense for a licensed plumber.
How much will a plumber charge to replace a shower valve?
Cartridge replacement by a plumber typically runs $100 to $350 including labor, while a full valve replacement usually falls between $225 and $575. Costs climb further when tile removal or drywall repair is needed to reach the valve.
How do I know which shower valve I have?
Remove the handle and escutcheon plate to expose the valve body, then look for a stamped model number or a "hot side" marking near the stem. Manufacturer guides recommend also noting the handle's motion and screw placement, since these details determine which cartridge or trim kit will actually fit.
Do I need a plumber to replace a shower valve?
You need a plumber when the job involves soldering, repiping, no back access to the valve, or visible corrosion on the valve body. A straightforward cartridge replacement with clear access rarely requires professional help, but a full valve-body swap often benefits from one, particularly where a permit applies.
Sources
- Chicago Building Permits — plumbing FAQ
- How much does a shower valve replacement cost? — HomeGuide
- RP46074 Shower Cartridge — Delta support