
If your water heater is leaking, shut off the power at the breaker (or turn a gas unit's control to "pilot") and close the cold-water inlet valve right away. Put towels or a shallow pan under the leak and keep the heater off until you know where the water is coming from. A leak at the base of the tank means the unit is likely done for and shouldn't be run again. If you smell gas or see water pooling near outlets or your electrical panel, get everyone out and call your gas utility or 911 before you do anything else.
TL;DR:
- Leaks at the top fittings or heat relief valve often result from worn connections and are straightforward to repair, unlike bottom or seam leaks indicating tank failure.
- High water pressure above 80 psi can cause ongoing leaks at fittings or valves and requires a pressure-reducing valve to prevent damage and repeated leaks.
- Condensation on the tank's surface can mimic leaks but can be distinguished by a paper towel test and inspection of fittings and discharge pipes.
- Addressing sediment buildup and replacing worn anode rods can extend the life of your water heater and reduce the likelihood of leaks.
- Most leaks from the tank bottom or seams require replacement; repair options are limited and often not cost-effective over time.
Table of Contents
- What To Do First When Your Water Heater Is Leaking
- Is It Actually a Leak, or Just Condensation?
- Common Causes Of Water Heater Leaks By Location
- Safe DIY Fixes For A Leaking Water Heater
- When Should You Call A Plumber Instead Of Fixing It Yourself?
- Water Heater Maintenance Tips That Prevent Leaks
- What Our Techs See Most Often On Leak Calls
- The Habit Most Homeowners Skip, And Why It Costs Them
- Get A Leaking Water Heater Fixed Right The First Time
- Sources
- FAQ
What To Do First When Your Water Heater Is Leaking
Once the power and water are handled, the next few minutes decide whether you're dealing with a mop bucket or a flooring replacement. Move through these steps in order.
- Cut the power. For an electric water heater, find the dedicated breaker in your panel (it's usually labeled) and flip it off. Never touch the unit itself if water has reached the electrical connections.
- Set gas units to pilot. Turn the gas control knob to "pilot," which shuts off the burner without you needing to relight it from scratch later.
- Close the cold-water inlet. This is the valve on top of the tank, usually with a blue handle, that feeds water into the heater. Turning it clockwise stops new water from entering a tank that's already losing water somewhere else.
- Shut the main house valve if you can't isolate the tank. If the inlet valve is stuck or missing, shut off your home's main water supply instead. It's better to lose water pressure everywhere for ten minutes than to keep feeding a leak.
- Protect the floor and outlets. Slide towels, a wet vac, or a shallow container under the leak, and move anything electrical away from the water's path.
Taking these steps immediately keeps a small problem from becoming water damage to your subfloor, drywall, or the electrical panel nearby. Smith's guidance on leaking water heaters](https://www.hotwater.com/info-center/water-heater-leaking.html). Treat a steady stream from the temperature and pressure (T&P) relief valve, any gas odor, or water pooling near outlets as reasons to stop troubleshooting and call for help.
Is It Actually a Leak, or Just Condensation?
A wet floor around your water heater doesn't always mean a leak. Cold water filling a tank, or a cold snap outside, can cause moisture to bead up on the tank's surface the same way a glass of iced tea sweats on a summer afternoon. That moisture typically disappears on its own once the tank warms up, according to guidance from Whirlpool on water heater leaks.
Here's a simple way to tell the difference:
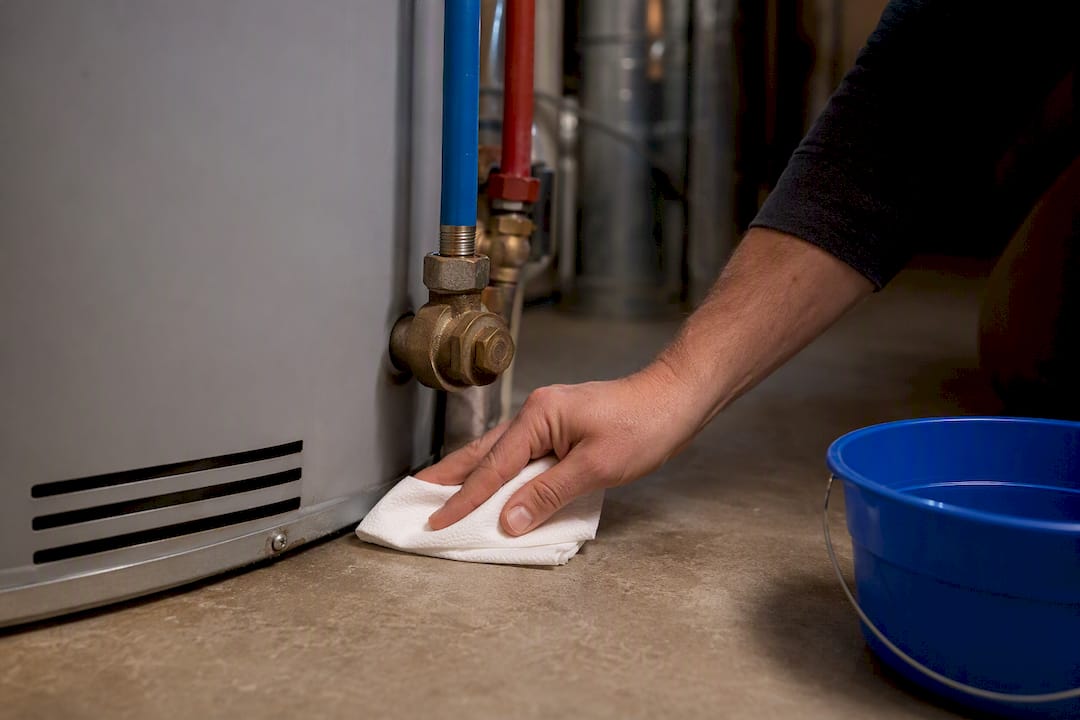
- Dry the entire tank and the floor beneath it with a towel, then wait 15 to 30 minutes without touching anything.
- Lay a strip of paper towel along suspect seams, joints, and the tank base. Wet paper towels after the wait means you have an active leak, not condensation.
- Check top connections first: the cold inlet, hot outlet, the short brass nipples, and the flexible connectors. A damp thread or a drip at a fitting usually points to a loose or worn connection rather than tank failure.
- Look at the T&P valve and its discharge pipe. A few drops right after a hot shower can be normal pressure venting, but a steady trickle or continuous flow is not.
- Get down and check the drain valve and the base of the tank, including under the outer jacket if you can see it, for seepage or rust-colored water.
- Rule out sources that aren't the heater at all, like a condensate line from an AC unit, a plumbing joint overhead, or a nearby floor drain backing up.
Pro Tip: Keep a phone flashlight handy and check the water heater in the same 15 minutes you check your washing machine hoses. Both are common, boring leak sources that homeowners overlook until the damage is done.
Common Causes Of Water Heater Leaks By Location
Where the water is coming from tells you almost everything about how serious the problem is and whether it's worth fixing. Plumbers diagnose leaking water heaters by working from the top of the tank down, since the causes get more expensive to fix the lower you go.
Top of the tank. Leaks here usually come from the cold inlet and hot outlet fittings, the nipples that connect them to the tank, or the flexible supply lines. These parts get worked every time the water heater cycles through heating and cooling, and over years the metal threads or rubber seals wear out. This is one of the more forgiving leak locations, since replacing a union fitting or a flexible connector is a straightforward repair.
Side of the tank, near the T&P valve. The temperature and pressure relief valve is a safety device designed to open if pressure or heat inside the tank climbs too high. A slow drip from this valve often points to excess water pressure or thermal expansion in your plumbing system rather than a broken valve, and simply swapping the valve without addressing the root cause usually doesn't stop the discharge, according to AlertPlumber's troubleshooting guide. If you have a closed plumbing system with no expansion tank, this is often the first symptom you'll notice.
Drain valve, near the bottom. The drain valve is used for flushing sediment out of the tank, and it's also one of the most common points of failure, especially on older plastic valves. The good news: a leaking drain valve is commonly repairable just by replacing the valve itself, according to Plumbing Resource's step-by-step leak guide, and a hose cap can buy you a day or two if you need a temporary stopgap.
Bottom of the tank or the seam. This is the leak location nobody wants to see. Water pooling underneath the tank itself, especially from the seam where the tank was welded, typically means internal corrosion or a breach in the glass lining that protects the steel tank. According to Plumb Inc's guide to fixing a leaking water heater, leaks at this location are not repairable and mean it's time to replace the unit, not patch it.
A few underlying issues tend to show up across multiple locations and speed up all of the above:
- High incoming water pressure that stresses fittings, valves, and the tank itself over time.
- Sediment buildup at the bottom of the tank, which traps heat against the steel and accelerates corrosion.
- A depleted anode rod, the sacrificial metal rod that corrodes so your tank doesn't have to; once it's gone, the tank is next.
Safe DIY Fixes For A Leaking Water Heater
Some leaks are well within a homeowner's toolbox and confidence level. Others aren't. Here's where the line sits.
- Tighten loose fittings correctly. Use two wrenches, one to hold the pipe steady and one to turn the fitting, so you're not twisting the whole assembly and creating a new leak somewhere else. Snug is the goal, not gorilla-tight.
- Reapply plumber's tape or pipe dope on threaded connections that are seeping rather than gushing, then retest with the paper-towel method after 30 minutes.
- Cap and replace a leaking drain valve. A brass replacement valve outperforms the plastic ones many tanks ship with, and it's a manageable swap with the tank's water isolated.
- Swap a worn flexible connector. If the corrugated supply line itself is leaking rather than the nipple it's threaded onto, replacing the connector is usually a simple, inexpensive fix.
- Test your T&P valve carefully. Lift the small test lever briefly to confirm water flows through the discharge pipe and then stops fully. If it keeps running after you release the lever, the valve needs replacement, not a cap. Never plug or cap a discharging T&P valve; that turns a safety device into a pressure bomb.
Corroded nipples that won't budge, any leak involving the gas line or electrical components, and anything coming from the tank body itself belong to a professional. Trying to force a stuck fitting on an old water heater often cracks a nipple clean off, turning a drip into a flood.
Pro Tip: Keep a bucket and a rag on hand before you touch anything. Even a "small" fitting repair can release a surprising amount of water once you break the seal.
When Should You Call A Plumber Instead Of Fixing It Yourself?
Some situations don't leave room for trial and error. Call a professional right away if you notice any of the following:
- Water coming from the tank bottom or seam, which signals internal corrosion that can't be patched.
- Continuous discharge from the T&P valve rather than an occasional drip.
- Any smell of gas near the unit, or leak water anywhere near outlets, switches, or your panel.
- Flooding that's already reached walls, cabinets, or flooring.
Age matters too. Most tank water heaters last several years, and once a unit of that age develops a leak, repair costs often approach those of a new tank. A single failed fitting on a heater with a healthy anode rod is usually worth repairing. Multiple failures in a short window, a badly depleted anode rod, or any seam leak point toward replacement being the smarter move.
When a plumber comes out for a leak call, expect them to inspect the anode rod's condition, check your home's water pressure, and assess sediment buildup, since these three factors largely determine how much life is left in the tank. Before the visit, snap photos of the leak, note when you first noticed it, and jot down any maintenance you remember having done. That handful of details often shortens the diagnostic time considerably.
Water Heater Maintenance Tips That Prevent Leaks
Most of the leaks plumbers get called out for were preventable. A little attention once or twice a year goes a long way toward keeping your tank sealed and your utility bills down.
- Flush the tank annually. Sediment settles at the bottom and traps heat against the steel, which speeds up corrosion and can cause overheating, according to Whirlpool's maintenance guidance. Our step-by-step flushing guide walks through the process.
- Check the anode rod every few years. If it's coated in calcium or worn down to bare wire, replace it before it stops protecting the tank altogether.
- Test the T&P valve once a year using the lift-test method, and consider an expansion tank if your plumbing is a closed system or you're seeing pressure-related discharge.
- Measure your home's water pressure. Anything above 80 psi stresses your fixtures and your water heater, and a pressure-reducing valve (PRV) is worth installing if you're running high, per Whirlpool's pressure recommendations.
- Do a quick visual check every three months. Look for rust streaks, moisture on the floor, or a musty smell near the unit.
Cutting your hot water use during peak stress periods also eases the load on the system, which is a small habit that adds up over a tank's lifespan. For a fuller rundown of what extends a tank's service life, see our guide to maintaining your water heater.
What Our Techs See Most Often On Leak Calls
Slow drips from the T&P valve, corroded nipples on top of the tank, and drain valves that finally give out after years of never being touched. Those three account for a big share of the leak calls our team runs across New Mexico. Corrosion at the nipples is usually the first physical sign a tank is aging out, which is why we always take a look at the anode rod while we're already under the jacket. It's a quick check that tells us a lot about how much life is left.
Our triage on-site mirrors what we've walked through here: dry the area, run the paper-towel test, and recheck in 15 to 30 minutes before assuming the worst. It's simple, and it keeps homeowners from replacing a $12 valve or a whole tank over what turned out to be condensation.
The Habit Most Homeowners Skip, And Why It Costs Them
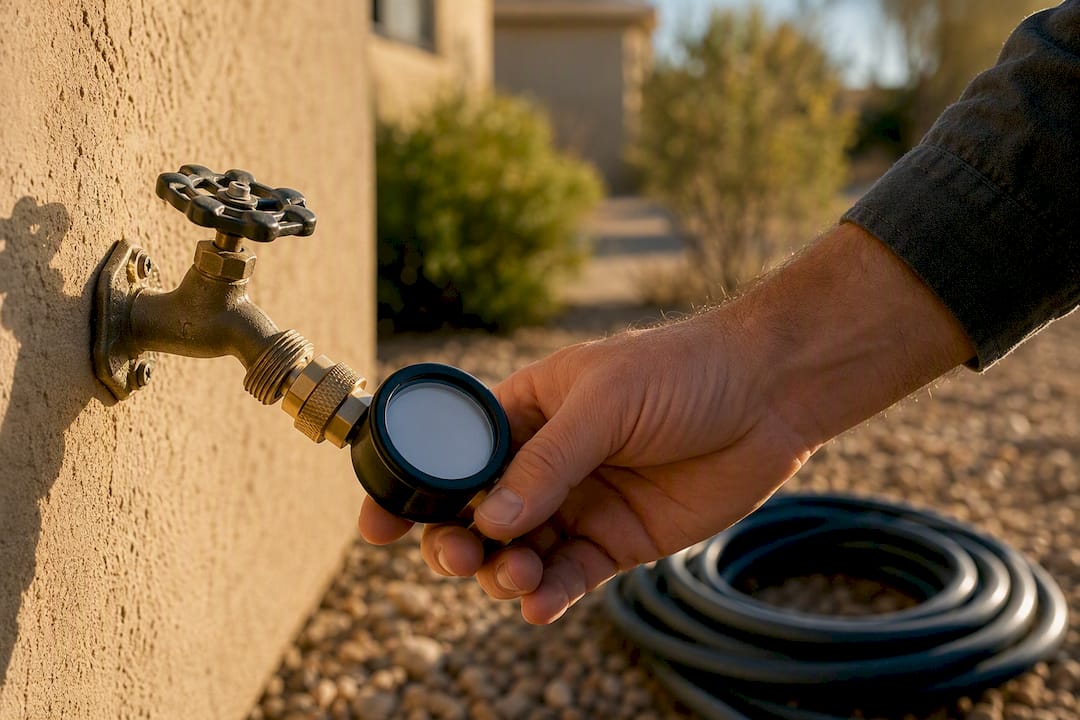
Everyone treats a water heater like a set-it-and-forget-it appliance, right up until it isn't. The most overlooked fix in this entire topic isn't a repair at all, it's checking your home's water pressure. Most homeowners have never touched a pressure gauge to their outdoor spigot, yet chronically high pressure is quietly behind a large share of the T&P drips and premature fitting failures we get called out for.
The conventional advice tells people to replace a dripping T&P valve and move on. That's treating a symptom. If the pressure feeding your home sits above 80 psi, a new valve will drip again within a year, sometimes within months. The fix isn't a better valve. It's a pressure-reducing valve on the main line and, in a lot of cases, an expansion tank that gives your closed system somewhere to send pressure spikes instead of venting them through your water heater.
I'd also push back gently on the instinct to keep repairing an aging tank indefinitely. There's a point, usually once a unit passes the 10 year mark and has already needed one fitting or valve repair, where every dollar spent on a patch is a dollar not going toward a replacement that comes with a fresh warranty and better efficiency. Homeowners who treat every leak as an isolated event, instead of a pattern, tend to spend more over a tank's lifetime than they would have spent replacing it a year earlier.
— Aaron
Get A Leaking Water Heater Fixed Right The First Time
A leaking water heater rarely fixes itself, and guessing at the cause can turn a $50 valve into a flooded utility closet. We handle leak diagnosis, connector and valve replacement, full tank replacement, and tankless conversions for homeowners, with technicians who explain exactly what they find instead of leaving you guessing.

Every visit starts with the same safety-first checklist we walked through above: confirming the leak location, checking your anode rod and water pressure, and laying out your repair-versus-replace options before any work begins. We keep the job site clean and communicate directly, no automated call centers standing between you and the person actually working on your tank. If your water heater is showing signs it needs help, reach out to schedule a diagnostic visit, whether it's an emergency shutoff situation or a drip you want looked at before it becomes one.
Sources
For more detail beyond this guide, A.O. Smith's leak diagnosis overview covers manufacturer safety guidance, AlertPlumber's troubleshooting article breaks down T&P valve behavior, and Plumb Inc's repair guide explains when a tank is past repair.
- Water Heater Leaking: What To Do | AlertPlumber
- How to Fix a Leaking Water Heater - Plumb Inc - Plumber
- What to Do If It Leaks | Whirlpool Water Heaters
FAQ
What Should I Do If My Water Heater Is Leaking?
Shut off the power at the breaker or turn a gas unit to pilot, close the cold-water inlet valve, and contain the water with towels or a pan while you locate the source.
Can I Still Use Water If My Water Heater Is Leaking?
You can generally still use cold water once the heater is isolated from the supply, but avoid running hot water or the heater itself until the leak source is identified, especially if it's coming from the tank bottom.
How Long Will A Water Heater Last Once It Starts Leaking?
It depends entirely on the location: a leak at a top fitting or drain valve can often be repaired and the tank kept running for years, while a leak at the tank bottom or seam means the unit has effectively reached the end of its service life.
Why Would A Water Heater Leak From Underneath?
A leak underneath the tank almost always means internal corrosion or a breach in the tank's glass lining, which isn't repairable and calls for replacement rather than a patch.